

Chats
The Chats section lets you communicate directly with individual users or with groups through circle-based conversations, all from within the Backoffice.
1:1 Chats
Section titled “1:1 Chats”Chat list
Section titled “Chat list”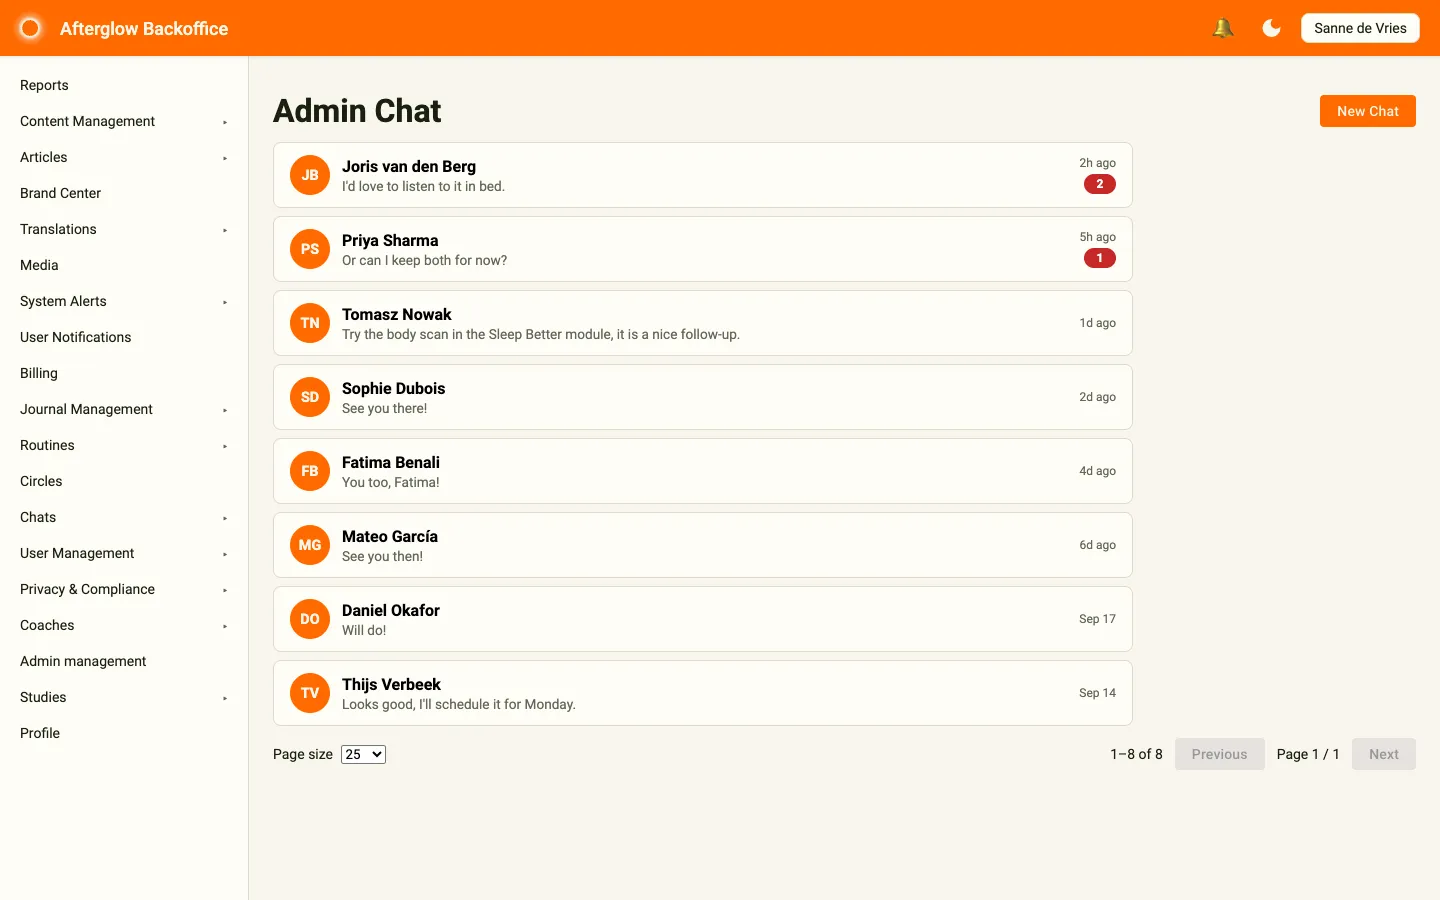
Open the list from the sidebar by selecting Chats > 1:1 Chats. The Admin Chat page displays all your 1:1 conversations, with the most recent activity at the top. Each conversation shows:
- The other user’s initials and name.
- A preview of the most recent message.
- When the last message was sent (for example, “2h ago”, or a date for older conversations).
- An unread badge with the number of messages you have not yet read.
The Chats item in the sidebar also shows a badge with your total number of unread messages.
Starting a new chat
Section titled “Starting a new chat”- Click the New Chat button at the top of the page.
- Search for a user by name or email. The list shows matching users along with their email address.
- Click the user you want to message.
You are taken directly into the conversation. If a conversation with that user already exists, you are taken to the existing one.
Conversation view
Section titled “Conversation view”Clicking a conversation from the list opens the full message view. The header shows the other user’s initials, name, and email address. Use the back arrow to return to the list.
Your own messages appear on the right side, while the other user’s messages appear on the left with their name. Each message shows how long ago it was sent.
To send a message, type in the text field at the bottom and press Enter or click Send. Press Shift+Enter to start a new line. Messages are delivered with live updates – incoming messages appear automatically without needing to refresh the page.
Circle chats
Section titled “Circle chats”Circle chat list
Section titled “Circle chat list”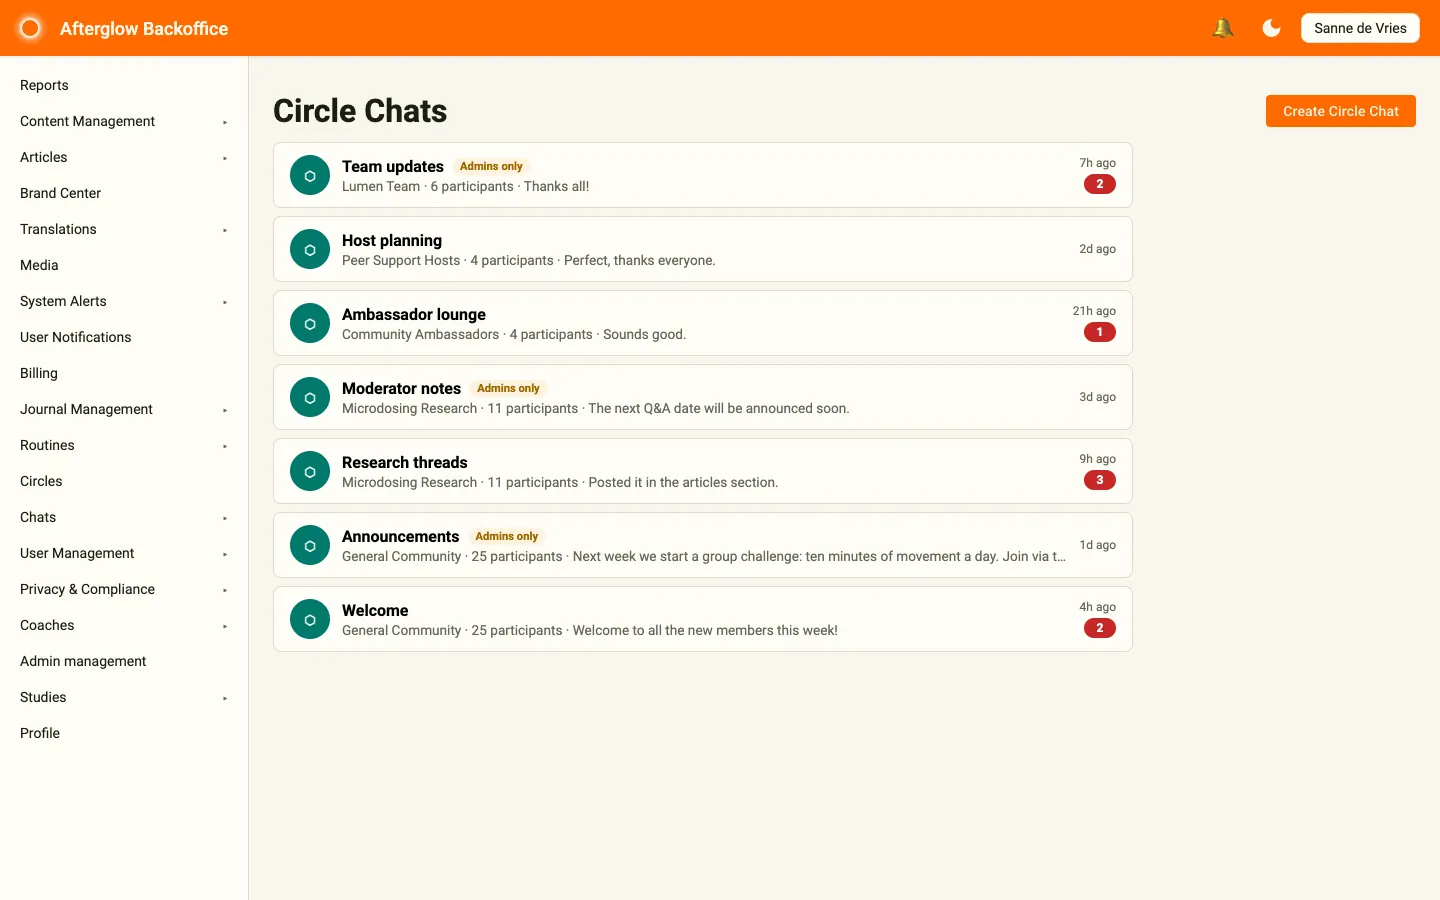
Open the list from the sidebar by selecting Chats > Circle Chats. The page displays the group conversations tied to circles that you take part in. Each entry shows:
- The chat title.
- The circle name, the number of participants, and a preview of the most recent message.
- When the last message was sent.
- An unread badge if there are messages you have not read.
- An Admins only badge if only admins can send messages in the chat.
Creating a circle chat
Section titled “Creating a circle chat”- Click the Create Circle Chat button.
- Select a Circle. Only circles that do not have a chat yet are listed, together with their member count. All members of that circle are added as participants.
- Optionally enter a Title. If you leave this blank, the circle name is used.
- Under Who can send messages, choose:
- All members – everyone in the circle can participate.
- Admins only – only admins can send messages, turning the chat into an announcement channel. Members can still read all messages.
- Click Create.
You are taken directly into the new circle chat once it is created.
Circle conversation view
Section titled “Circle conversation view”The circle conversation view works like a 1:1 chat. The header shows the chat title, the circle name, the number of participants, and Admins only if the chat is an announcement channel.
Messages from other people show the sender’s name, making it easy to follow who said what in a group setting. Live updates ensure you see new messages as they arrive. As an admin, you can always send messages, also in an Admins only chat.
Related topics
Section titled “Related topics”- Circles – How circles organize users into groups.