

Handling data export requests
A data export gives a user a full copy of the personal data the workspace holds about them, packaged as a single downloadable file. This page walks through the full flow from request to delivery.
What gets included in an export
Section titled “What gets included in an export”An export contains everything the platform stores about the user that is meaningful to them as a data subject — for example:
- Profile details, registration information, and preferences.
- Journal entries, AI analyses, emotion scores, and weekly summaries.
- Routine activity, completed lessons, saved articles, and survey responses.
- Research study participation — the user’s study enrolments and their scheduled questionnaires.
- Chat messages, article comments, and circle activity authored by the user.
- Booking history (with notes), consent decisions, and notification history.
The export is delivered as a single .json bundle in secure storage. Inside the bundle is:
- A manifest describing what is included, when it was generated, and the request it came from.
- One section per data area listed above.
- A SHA-256 checksum for each section so the user (or their auditor) can verify the file was not modified after download.
How a request reaches you
Section titled “How a request reaches you”An export request can arrive from three places:
- The user filed it themselves from the mobile app (or, for coaches and admins, from their own account privacy page in the Practice app). It starts as Pending and runs automatically.
- A coach filed it on behalf of a client. It starts as Awaiting confirmation and waits for your approval.
- An admin filed it for a user with Generate data export on the Privacy tab of the user’s profile in User Management. It starts right away; the reason is optional.
You only need to take action when a coach’s request is Awaiting confirmation or a request has Failed.
Step 1 — Triage the requests list
Section titled “Step 1 — Triage the requests list”- Open Privacy & Compliance from the sidebar and click Requests.
- Set Type to Export. The default Active status filter already includes requests that are awaiting confirmation; choose Awaiting confirmation to see only those.
- Click any row to open its detail page.
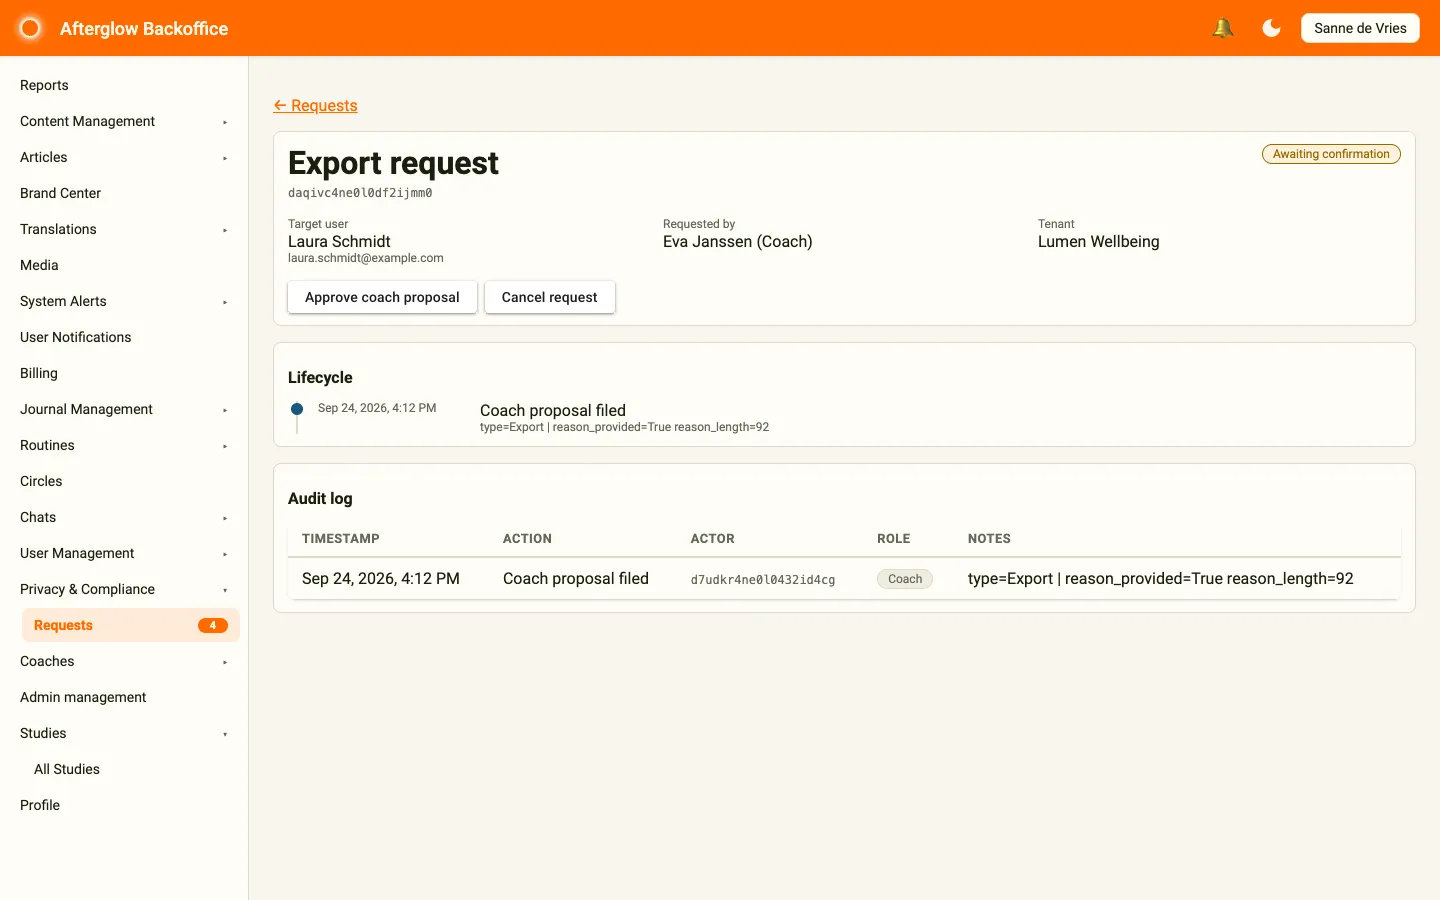
Step 2 — Review the request
Section titled “Step 2 — Review the request”On the detail page, check:
- Target user — Is this the right person? Cross-check the name and email.
- Requested by — If a coach proposed this request, the coach’s name appears here with the role Coach. If you have any doubt about whether the request is legitimate, contact the coach or the user before approving.
- Lifecycle and Audit log — Every step so far, with who did it and when. The audit log records that a reason was given, but not the reason text itself; if you need the coach’s explanation, ask the coach.
Step 3 — Approve the request
Section titled “Step 3 — Approve the request”Click Approve coach proposal, then Approve in the confirmation dialog (or Keep pending to leave it for now). The export starts right away and the request moves to In progress, then Completed once the bundle is ready.
If the request should not go ahead, click Cancel request instead, enter a reason for the audit log, and confirm.
Step 4 — Verify the bundle
Section titled “Step 4 — Verify the bundle”When the request reaches Completed, open the detail page again. It shows when the export completed and a Download bundle button.
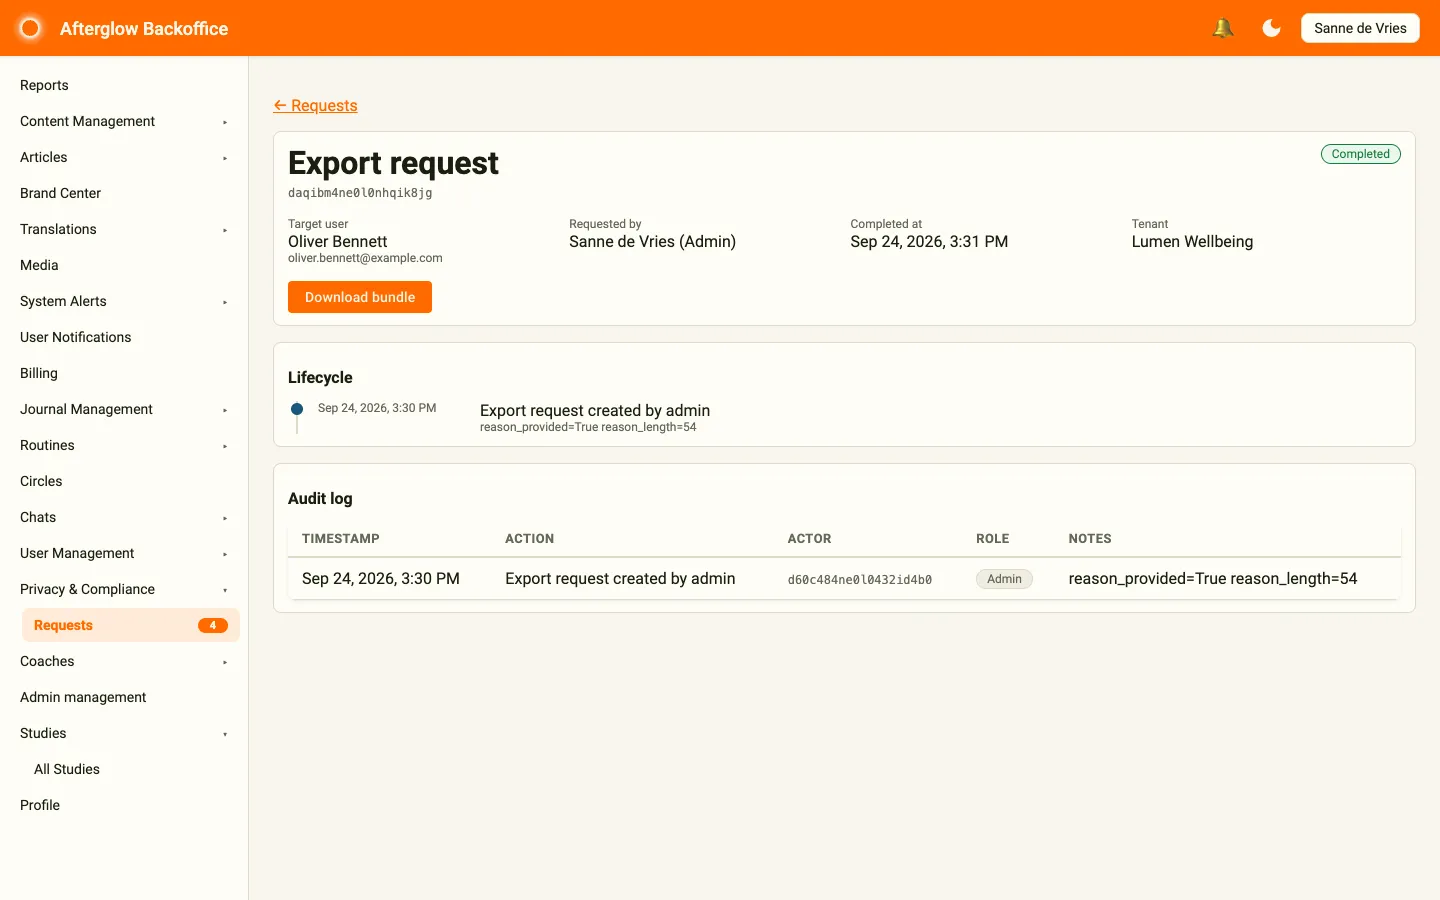
Use Download bundle to fetch the bundle yourself if you want to verify the contents before sending it to the user. The button opens a signed download link that is valid for 15 minutes. The button is no longer shown once the bundle has expired.
Step 5 — Deliver the bundle to the user
Section titled “Step 5 — Deliver the bundle to the user”The target user is automatically emailed and pushed a notification when the export is ready. They can collect the download themselves — you do not normally need to forward anything.
If the user prefers to receive it from you (for example because they no longer have access to the mobile app), use Download bundle on the detail page and share the file through a secure channel.
For admin-initiated exports, both the target user and the admin who requested the export receive the completion notification, so there is a clear paper trail.
Step 6 — Tell the user about the 7-day window
Section titled “Step 6 — Tell the user about the 7-day window”The bundle is automatically deleted from storage 7 days after it is generated. Make this clear when you contact the user. A short message such as:
“Your data export is ready. Please download it within 7 days — after that the file is automatically removed and we will need to generate a new one.”
…is usually enough. After the bundle is removed, the request itself stays in the Completed state for audit purposes.
What to do if a request fails
Section titled “What to do if a request fails”If a request reaches the Failed status:
- Open the request detail page.
- Read the failure reason shown in the top card.
- If the reason is a transient issue (for example, storage temporarily unavailable), file a new export for the same user from the Privacy tab of their profile in User Management.
- If the reason is unclear or persistent, raise it with your Afterglow representative — include the request ID shown under the page title.
Reading the manifest
Section titled “Reading the manifest”The manifest is the first file inside the export bundle. It is plain JSON and tells the user exactly what they are looking at, including:
- The date and time the bundle was generated.
- The user the bundle belongs to.
- A list of every section, the number of records in it, and its checksum.
You can paste the manifest contents into your reply to the user as proof of the export’s scope. There is no need to summarise individual records yourself.