

Circles
Circles let you organize users into groups with shared content and communication channels.
Circle overview
Section titled “Circle overview”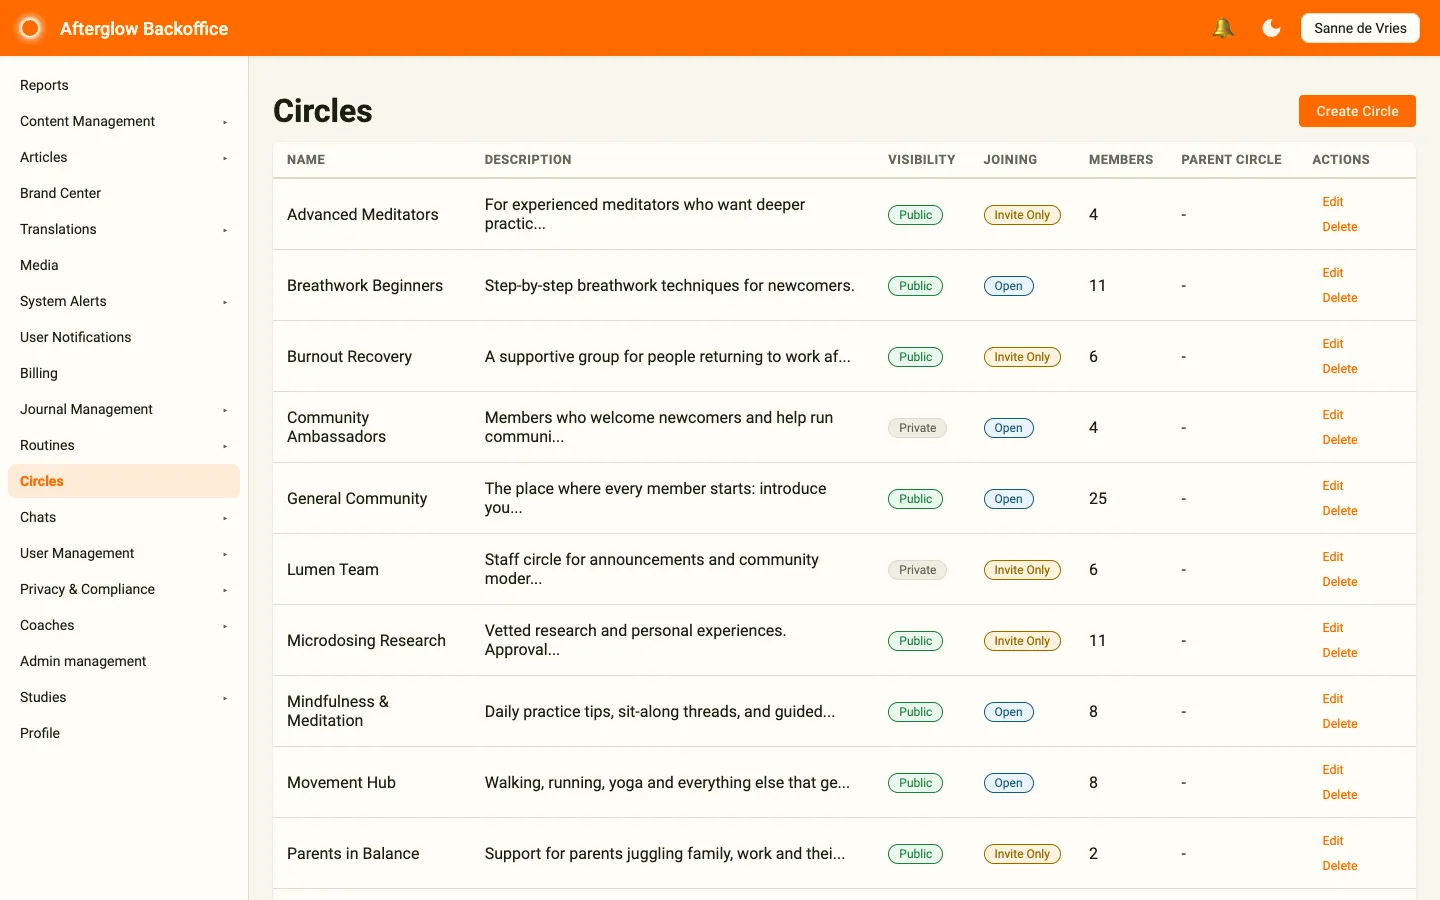
Open Circles from the sidebar by selecting Circles. The overview displays all circles in a table. Each row shows:
- Name of the circle.
- Description (truncated if longer than 50 characters).
- Visibility — Public or Private.
- Joining — Open (anyone can join) or Invite Only.
- Members count.
- Parent Circle, if the circle is nested under another circle.
From each row you can click Edit to open the circle detail page, or Delete to permanently remove the circle after confirming.
Creating a circle
Section titled “Creating a circle”Click Create Circle on the overview page to open the creation dialog. You can configure:
- Name — Required, up to 200 characters. Uses multilingual text.
- Description — Optional, up to 2000 characters. Uses multilingual text.
- Public — When checked, the circle is visible to all users. When unchecked, only members can see it.
- Open — When checked, users can join without an invitation. When unchecked, users must be invited or have their join request approved.
- Parent Circle — Optionally nest this circle under an existing circle.
Click Create to create the circle. When editing an existing circle, the button is labelled Save.
Circle limit
Section titled “Circle limit”Your subscription tier sets how many circles your workspace can have. Sub-circles (circles nested under a parent) count toward the limit too.
| Tier | Circles |
|---|---|
| Starter | 3 |
| Growth | 12 |
| Bespoke | Unlimited |
When you reach the limit, creating a circle shows a message that your plan’s circle limit has been reached. Delete a circle you no longer need, or upgrade your plan to create more. See Billing for your current tier.
Editing a circle
Section titled “Editing a circle”Open a circle from the overview to reach its detail page. Click Edit Circle to change any of the settings listed above. The detail page also shows an info card with the circle’s current description, visibility, joining mode, and parent circle (if any). Click Back to return to the overview.
Circle detail tabs
Section titled “Circle detail tabs”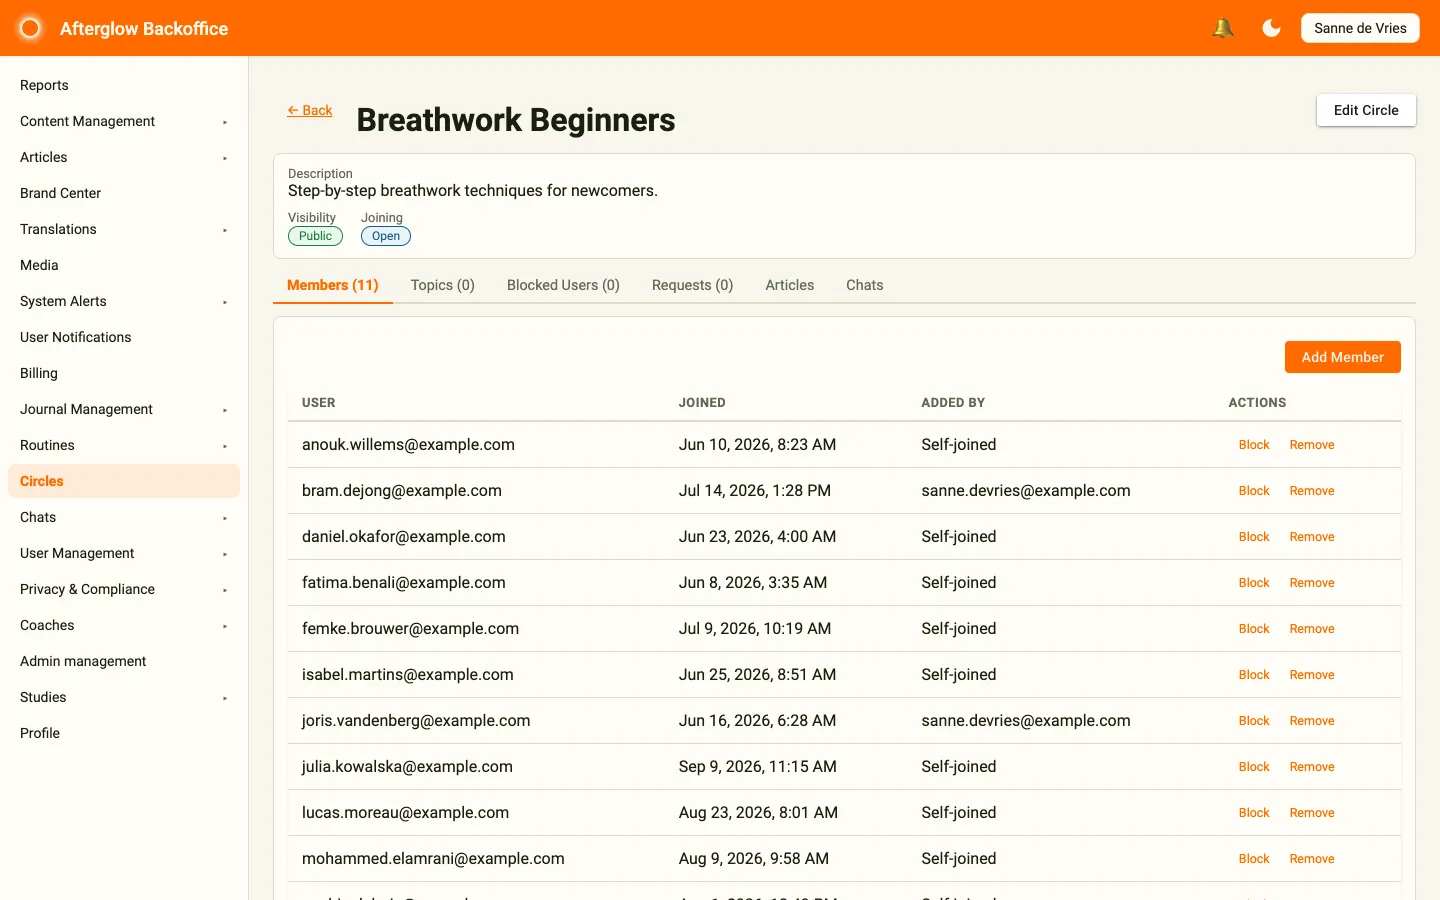
The detail page organizes circle management into six tabs. The first four tabs show a count in brackets, for example Members (11).
Members
Section titled “Members”The Members tab lists all current circle members with the date they joined and who added them (Self-joined when they joined on their own). From here you can:
- Add a member — Click Add Member and pick a user from the list. Users who are already members or blocked are not listed.
- Remove a member — Click Remove and confirm.
- Block a member — Click Block to block a current member from the circle (see Blocked Users below).
Topics
Section titled “Topics”The Topics tab lets you link topics to the circle. Topics control which articles are visible to circle members. Check one or more topics from the list of all available topics and click Save Topics to update.
Blocked Users
Section titled “Blocked Users”The Blocked Users tab shows all users who have been blocked from the circle. When you block a user:
- They are automatically removed from the circle if they are a current member.
- They cannot join or be added to the circle in the future.
- You can provide an optional reason for the block.
You can block a user in two ways: from the Members tab (to block an existing member) or with the Block User button on the Blocked Users tab (to block any user). The table shows when each user was blocked, by whom, and the reason. To restore access, click Unblock next to the blocked user.
Requests
Section titled “Requests”The Requests tab manages both join requests and invitations. It shows:
- Join requests — Submitted by users who want to join the circle, with their optional message. You can Approve or Reject each request.
- Invitations — Sent by you to specific users. While the invitation is pending, you can Cancel it.
To send a new invitation, click Send Invitation, select a user, optionally add a Message, and click Send Invitation in the dialog.
Articles
Section titled “Articles”The Articles tab appears only when the Articles feature is also enabled for your workspace. It lists all articles linked to this circle.
- Link an article — Click Link Article, select an article, and click Link. Articles already linked to the circle are not listed.
- Unlink an article — Click Unlink to remove the association between an article and the circle.
The Chats tab appears only when the Chat feature is also enabled for your workspace. It lists all chats associated with this circle.
You can connect chats to a circle in two ways:
- Create a chat — Click Create Chat to start a brand-new chat for the circle. All current circle members are automatically added as participants. You can set a Title (defaults to the circle name) and choose a Permission: All members can send messages or Admins only (announcement).
- Link an existing chat — Click Link Existing Chat, select a chat that isn’t linked to a circle yet, and click Link. All circle members are added as participants when the chat is linked.
To disconnect a chat, click Unlink. Circle members will be removed as chat participants.
Related topics
Section titled “Related topics”- Circles concept — How circles work from a user perspective.
- Multilingual text — Language tabs on circle names and descriptions.